Creating a Jupyter Notebook-Powered Data Science Blog with Pelican
Category > Others
Jan 27, 2019What powers this blog, Pythonic Excursions? - Pelican. - Me
Pelican is a static site genertor, written in Python. It is a Python library used to auto-generate HTML elements that are used to run websites. Pelican-powered blogs are light and easy to host with no scaling concerns. It pre-generates HTML files and responds with the existing files during a typical HTTP request-response cycle.
So, why should you use Pelican?
It's GREAT for Blogging
You can write your content directly with the editor of your choice in reStructuredText or Markdown formats. Select a favorite theme of your choice from a collection of Pelican-themes, and write articles. The CSS and Javascript contained in the theme will handle the rest and output your article nice and clean. One look is worth a thousand words. Take a look at this markdown file that is used to render this article through Github Pages by Jake VanderPlas. His blog is made with Pelican, after modifying some codes in Octopress theme (you can also write your articles in other formats, such as Jupyter Notebook, which powers this blog).
Minimal Learning Curves
Going through the official documenations, user-made tutorials, or YouTube videos can be painful. Using Pelican will minimize wasting your time dealing with the learning curves. One thing that makes it very easy to learn & modify is that there already are lots blogs that run on Pelican, and their source codes are open to public.
- Pythonic Excursions -- source code, Aegis-Jupyter Theme by Me
- onCrash = 'reboot();' -- source code, Elegant Theme by Talha Mansoor
- Pythonic Perambulations -- source code, Adapted Octopress Theme by Jake VanderPlas
- ... and many more
If you don't want to learn Pelican from scratch, you can download these open source repos and start from there. You will only need to learn how to tweak some settings to meet your needs.
Completely Static Output Is Easy To Host Anywhere
The output of Pelican is all HTML. You don't have to worry about configuring a complicated database and optimizing connections. Let's take a look at how Pelican works.
Most Pelican blogs have the following directory tree.
- blog
- content
- articles
- article_1.md
- article_2.md
- article_3.md
- figures
- images
- ...
- articles
- output
- category
- images
- figures
- index.html
- archives.html
- article_1.html
- article_2.html
- article_3.html
- plugins
- themes
- custom_theme
- static
- templates
- custom_theme
- Makefile
- pelicanconf.py
- publishconf.py
- content
output directory is the folder where Pelican stores the auto-generated HTML files, and those existing files are returned to the user who sent an HTTP request to view your website. The other directories are tools and templates used to generate the HTML files in the output folder. You do not need to configure a SQL database, or execute any codes on the server. All outputs are completely static.
Can Pelican Be Used In Dynamic Websites Too?
Yes, it can. Although Pelican is a static site generator, that does not mean that you can't have dynamic backend features on your website. You can pre-generate the output HTML files with Pelican, and just wrap it around with the backend framework of your choice.
Let's say that you are developing a web-app with Django, and you want part of your website to be a static blog. You have a Pelican-generated output HTML file called article_1.html. In Django, you can render your Pelican-generated HTML file using a basic Class-Based-View like this:
views.py
        from django.views.generic import TemplateView

        class PelicanView(TemplateView):
            template_name = 'article_1.html'
urls.py
        from django.urls import re_path
        from your_awesome_app import views

        app_name = 'your_awesome_app'

        urlpatterns = [
            re_path('^$', views.PelicanView.as_view(), name='pelican'),
        ]
And that's all it takes to integrate Pelican with Django. Part of your website can be static pages where it doesn't need to execute any code on a server, but the other part of your website can be dynamic pages where you can send queries to your server. Of course, the methodology to combine Pelican with dynamic backend will differ for each backend framework of your choice, but you get the idea.
Here is the point: Pelican is a static site generator, but that does not mean that Pelican can't be used in dynamic websites. And Pelican is GREAT for blogging.
Introducing Aegis-Jupyter Theme
Aegis-Jupyter theme is a custom Pelican theme I made to easily host & maintain a Jupyter Notebook powered data science blog. I borrowed some CSS design of the articles from Jake VanderPlas, and improved the rendering of Jupyter Notebook files by adding custom CSS & JS codes. Every articles you see in archives page is rendered using Jupyter Notebook .ipynb files, even this very article you are reading right now!
There are several reason's you why you might wanna consider using Aegis-Jupyter theme.
Jupyter-Notebook-Based Articles
First and foremost, your articles are be rendered by Jupyter Notebook. The question of "Why would you want to use Aegis-Jupyter theme?" is synonymous to "Why would you want to use Jupyter Notebook?" - it allows you to create and share documents that contain live code, equations, visualizations and narrative text. You don't have to go through the hassel of writing Python input codes in HTML, save the output visualizations in jpg or png files, and then render it on a browser using an image tag like this:
<img src="your_awesome_visualization.png">
No, don't do this. This is bad.
You don't want to be keep doing this for every single output of your code block. This is too much work. Simply write codes in Jupyter, save it, and render your article. Aegis-Jupyter theme was built for that purpose.
Mobile Device Friendly

The theme renders very nicely on all resolutions, screenwidth, and mobile devices. Try viewing this website on your phone. If you are on PC, try stretching & collapsing the browser size and see how it responsively re-aligns itself.
Google Analytics Support
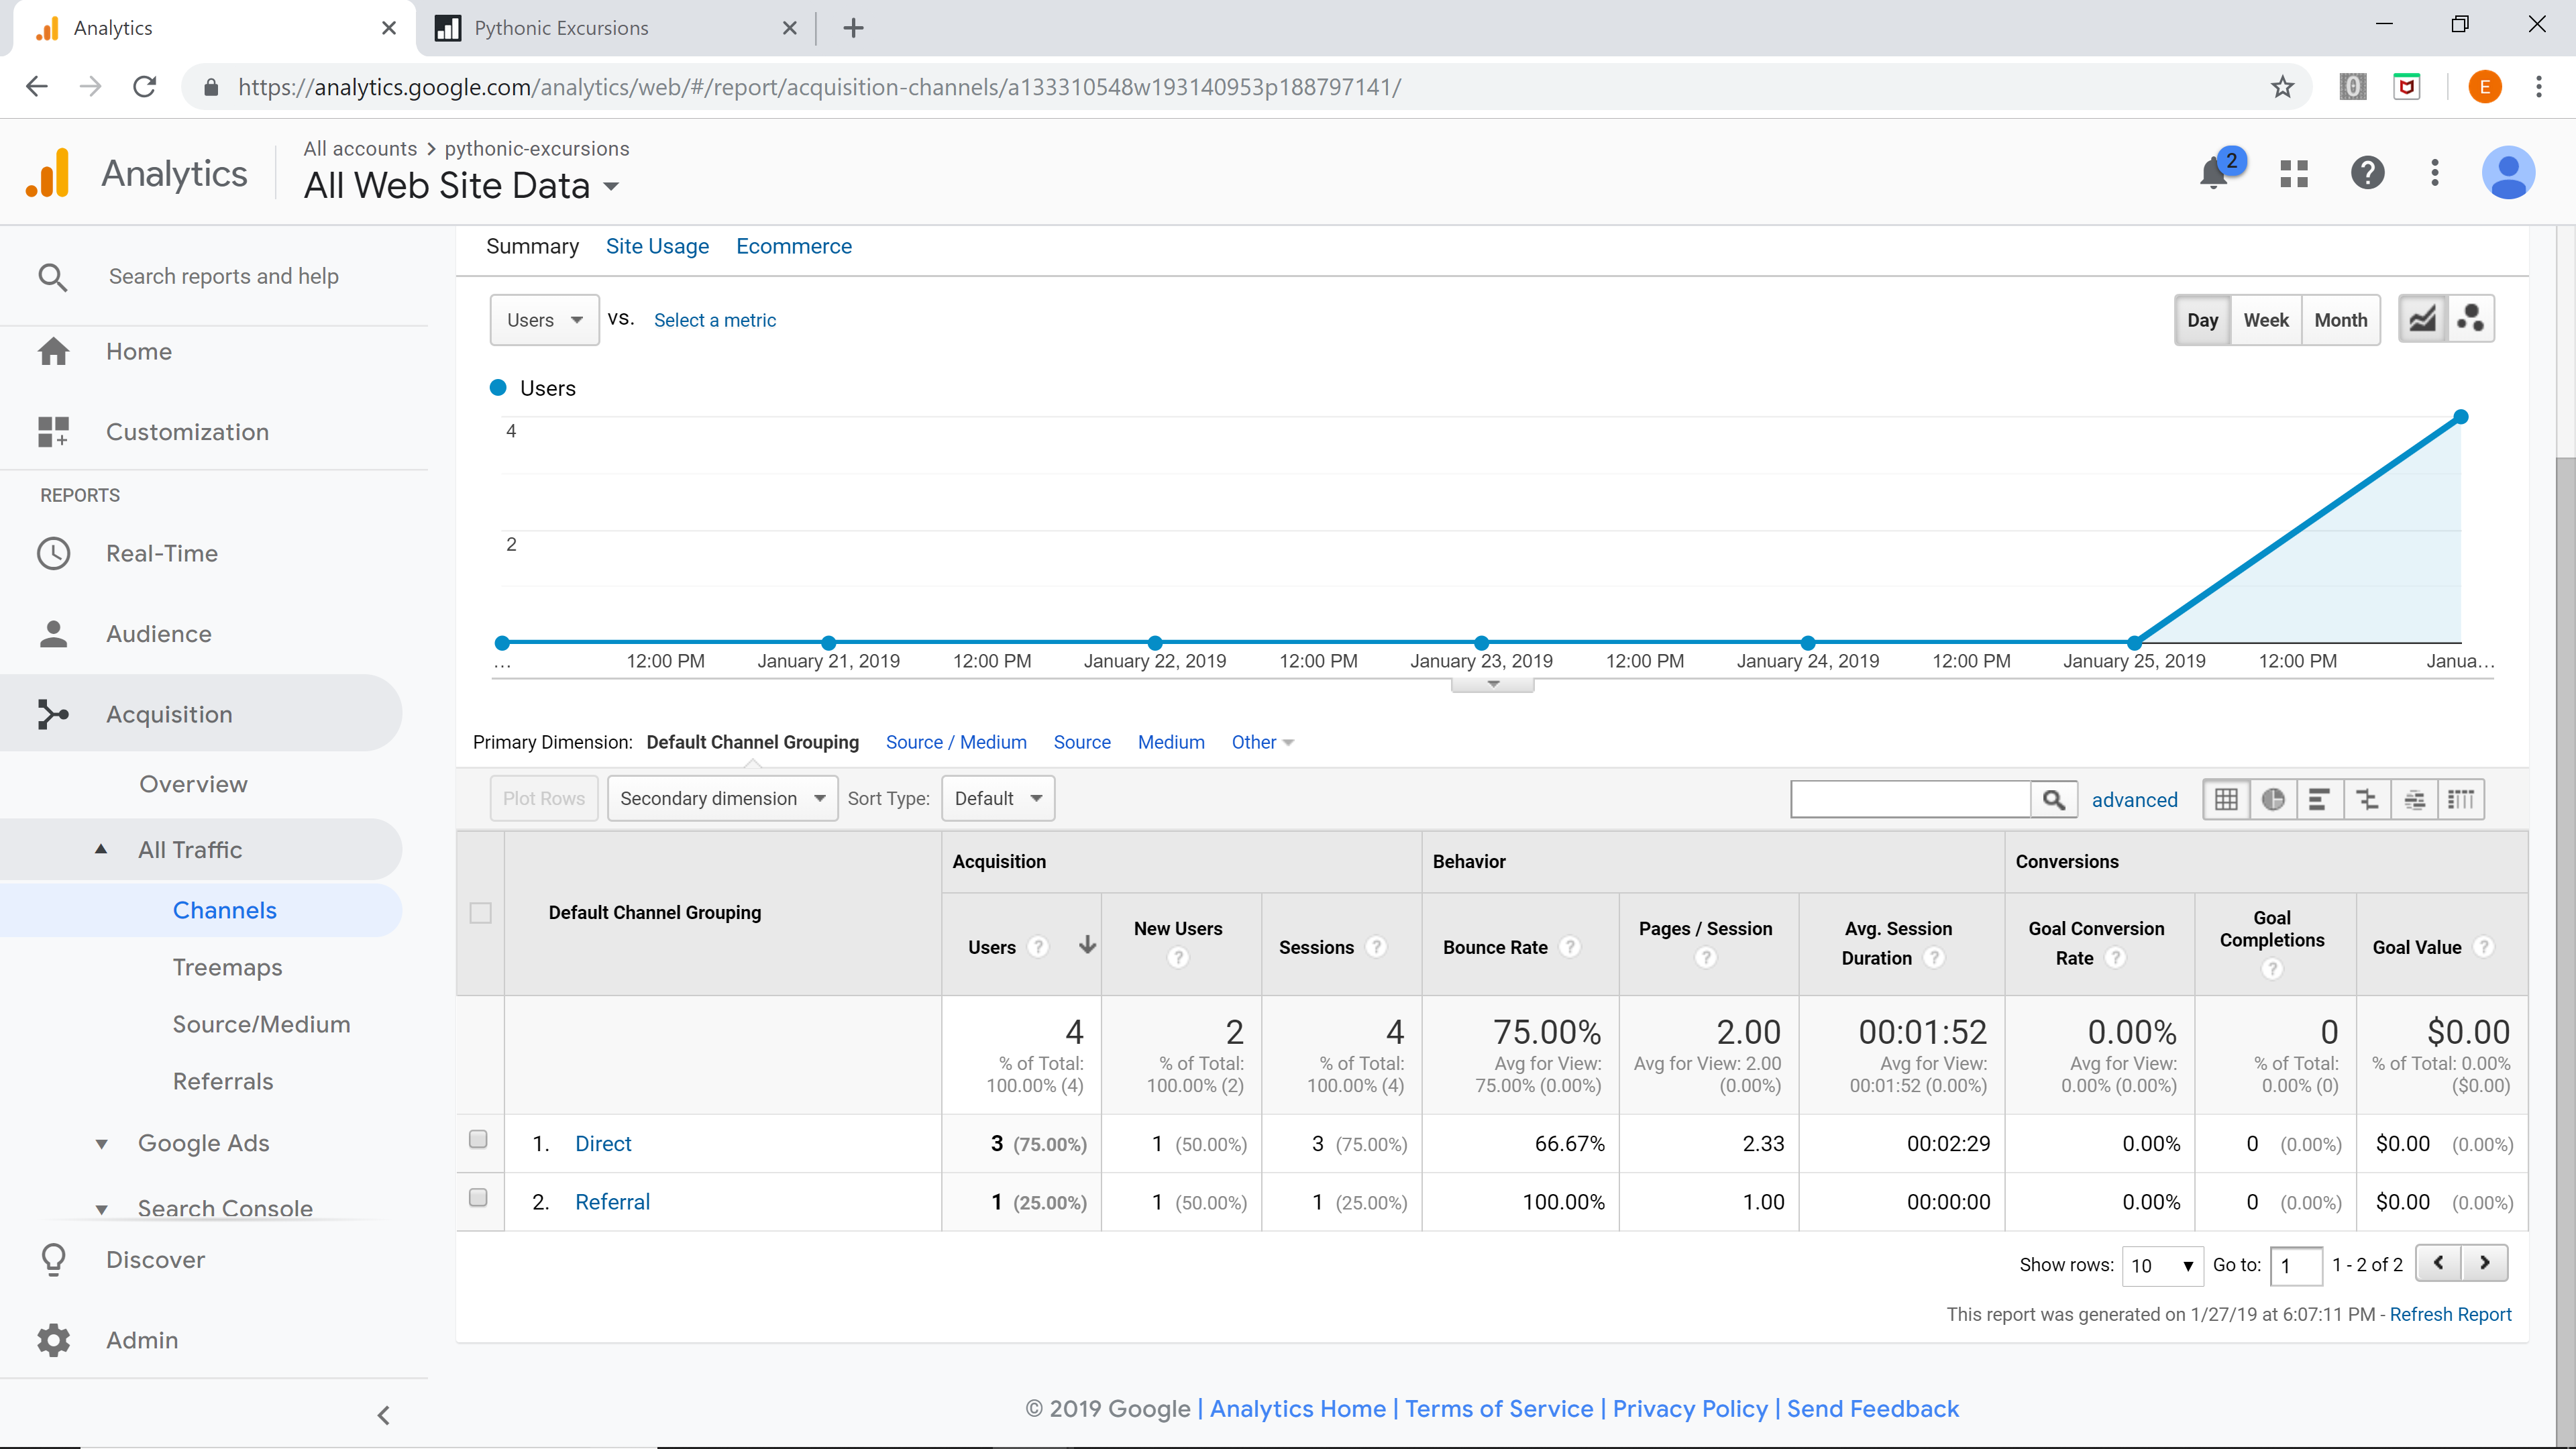

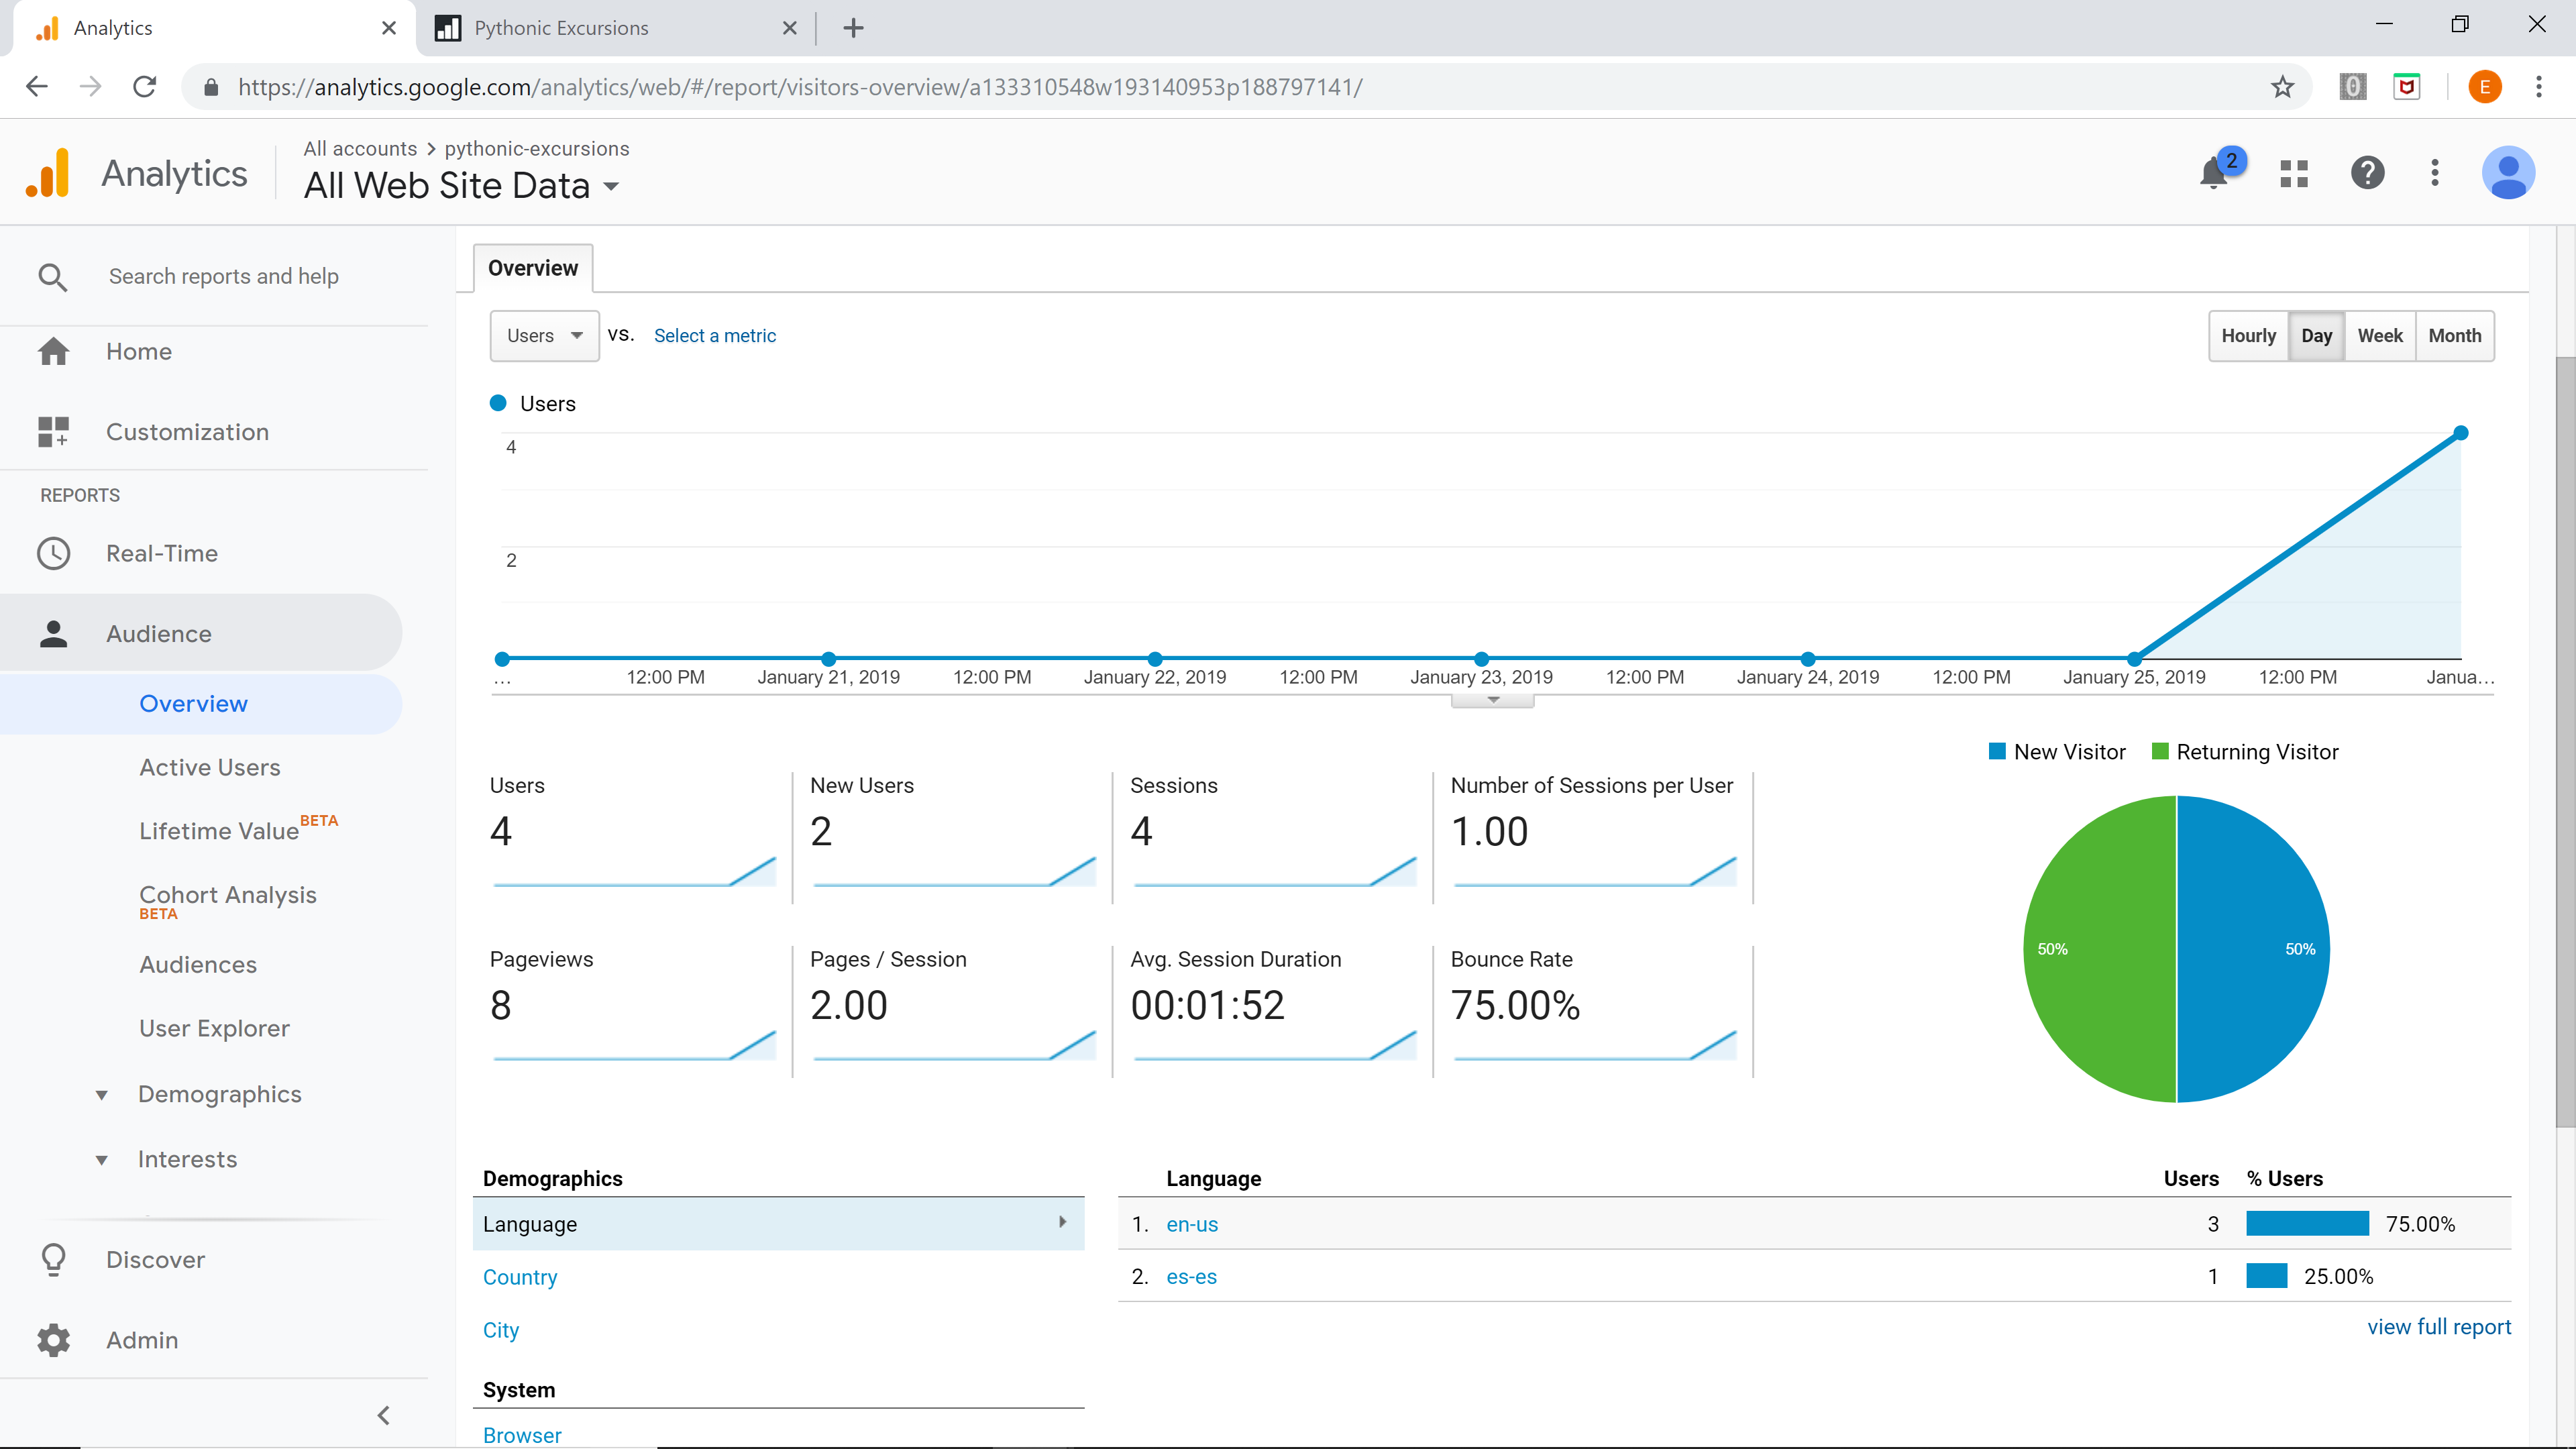
If you own any kind of website, not just a data science blog, at some point in your life you would be wondering about the behaviors of the viewers. How many people visit my website every week? How many of them are unique visitors? From what region do I get the most number of visitors? On average, how many minutes do people stay on my website? Which post was the most popular? From what social media platform do I get the most number of visitors from?
These kinds of questions can be answered by leveraging the power of Google Analytics, FOR FREE.
All you need to do is to create a Google Analytics account, get a tracking ID, and put that on publishconf.py file. For example, if your Google Analytics tracking ID is UA-1XXXXXXXX-1, then you set GOOGLE_ANALYTICS variable liks this:
publishconf.py
GOOGLE_ANALYTICS = "UA-1XXXXXXXX-1"
That's it. Aegis-Jupyter theme will take care of the rest. More detailed tutorials on how to create Google Analytics account and tracking ID will come later.
Easy to Manage Your Articles
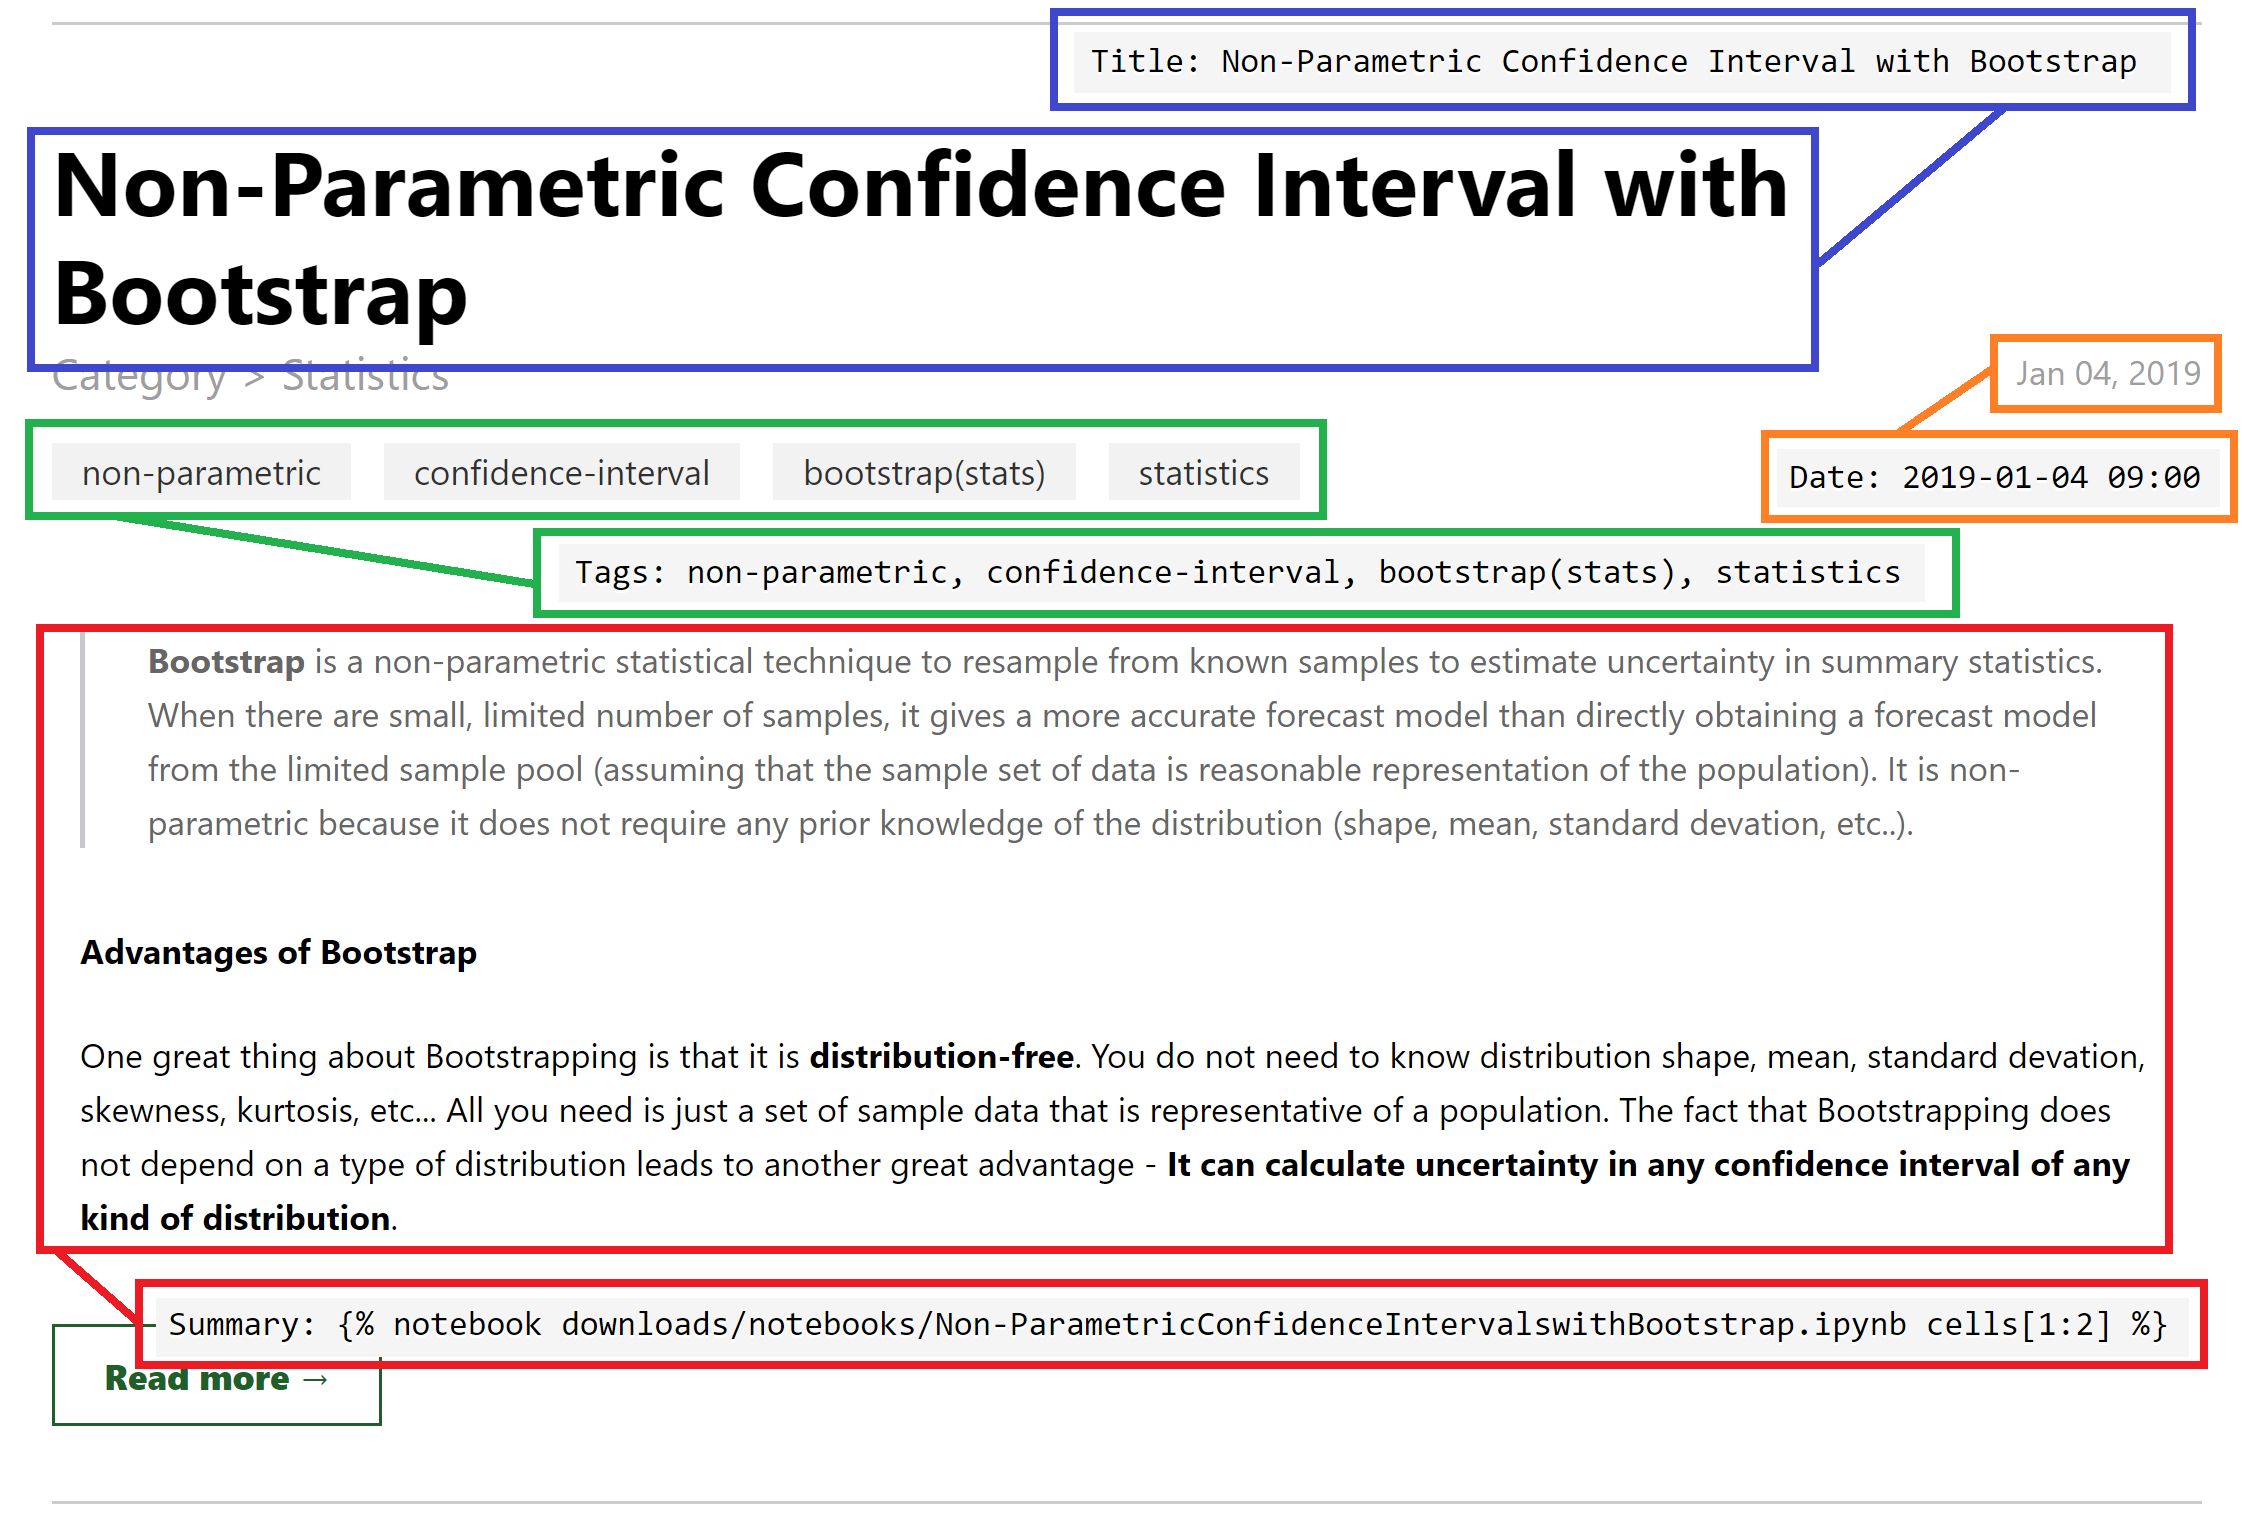
Meta properties of your article can easily be managed my changing attributes in markdown files. The below markdown is the actual .md file that renders this article.
non-parametric-confidence-interval-with-bootstrap.md
        Title: Non-Parametric Confidence Interval with Bootstrap
        Tags: non-parametric, confidence-interval, bootstrap(stats), statistics
        Date: 2019-01-04 09:00
        Slug: non-parametric-confidence-interval-with-bootstrap
        Subtitle:
        Keywords:
        Featured_Image: images/featured_images/bootstrap.png
        Social_Media_Description: Bootstrapping can calculate uncertainty in any confidence interval of any kind of distribution. It's great because it is distribution-free.
        Summary: {% notebook downloads/notebooks/Non-ParametricConfidenceIntervalswithBootstrap.ipynb cells[1:2] %}

        {% notebook downloads/notebooks/Non-ParametricConfidenceIntervalswithBootstrap.ipynb cells[:] %}
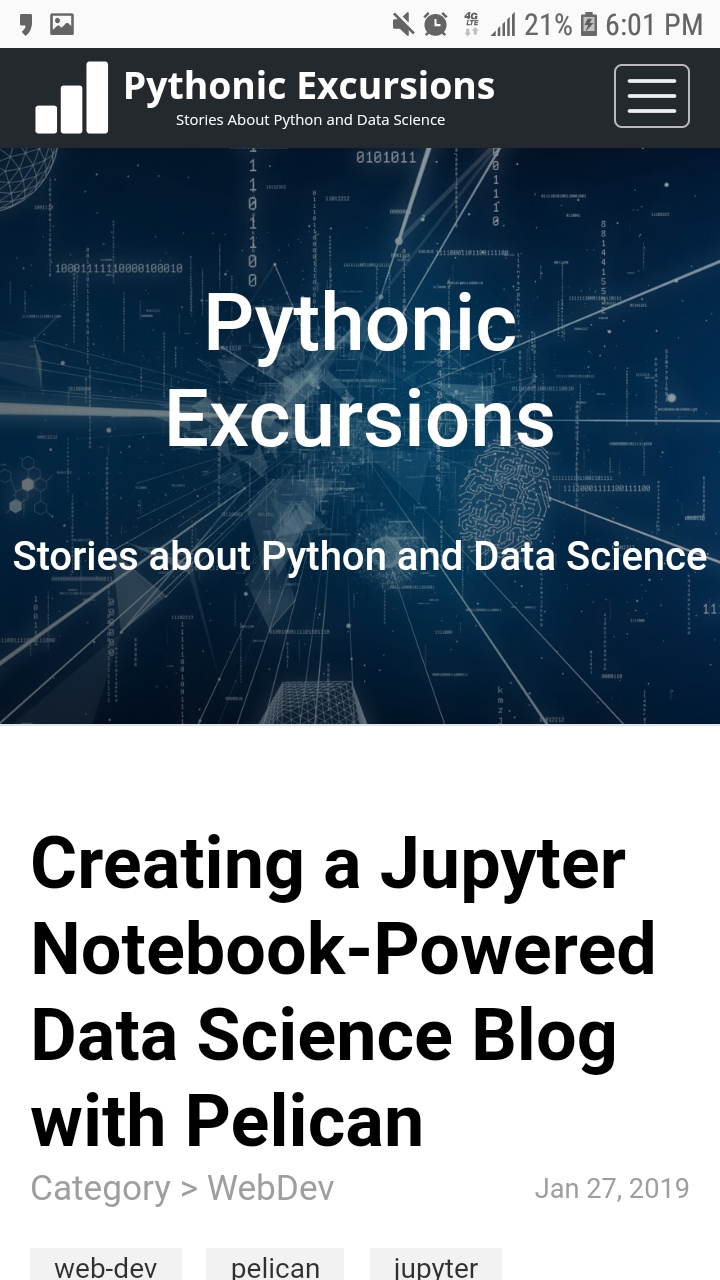
The below screenshot is the preview of the article on the landing page of this blog. Observe how each attribute in the markdown file is used to render the output preview page. You can declare additional attributes as much as you want.
Share Your Posts on Social Media
Aegis-Jupyter theme leverages the power of Open Graph Meta Tags and renders the preview of your website nicely when shared on social media. You can set a preview image by declaring Featured_Image and set preview descriptions by declaring Social_Media_Description for each article in its respective markdown files.
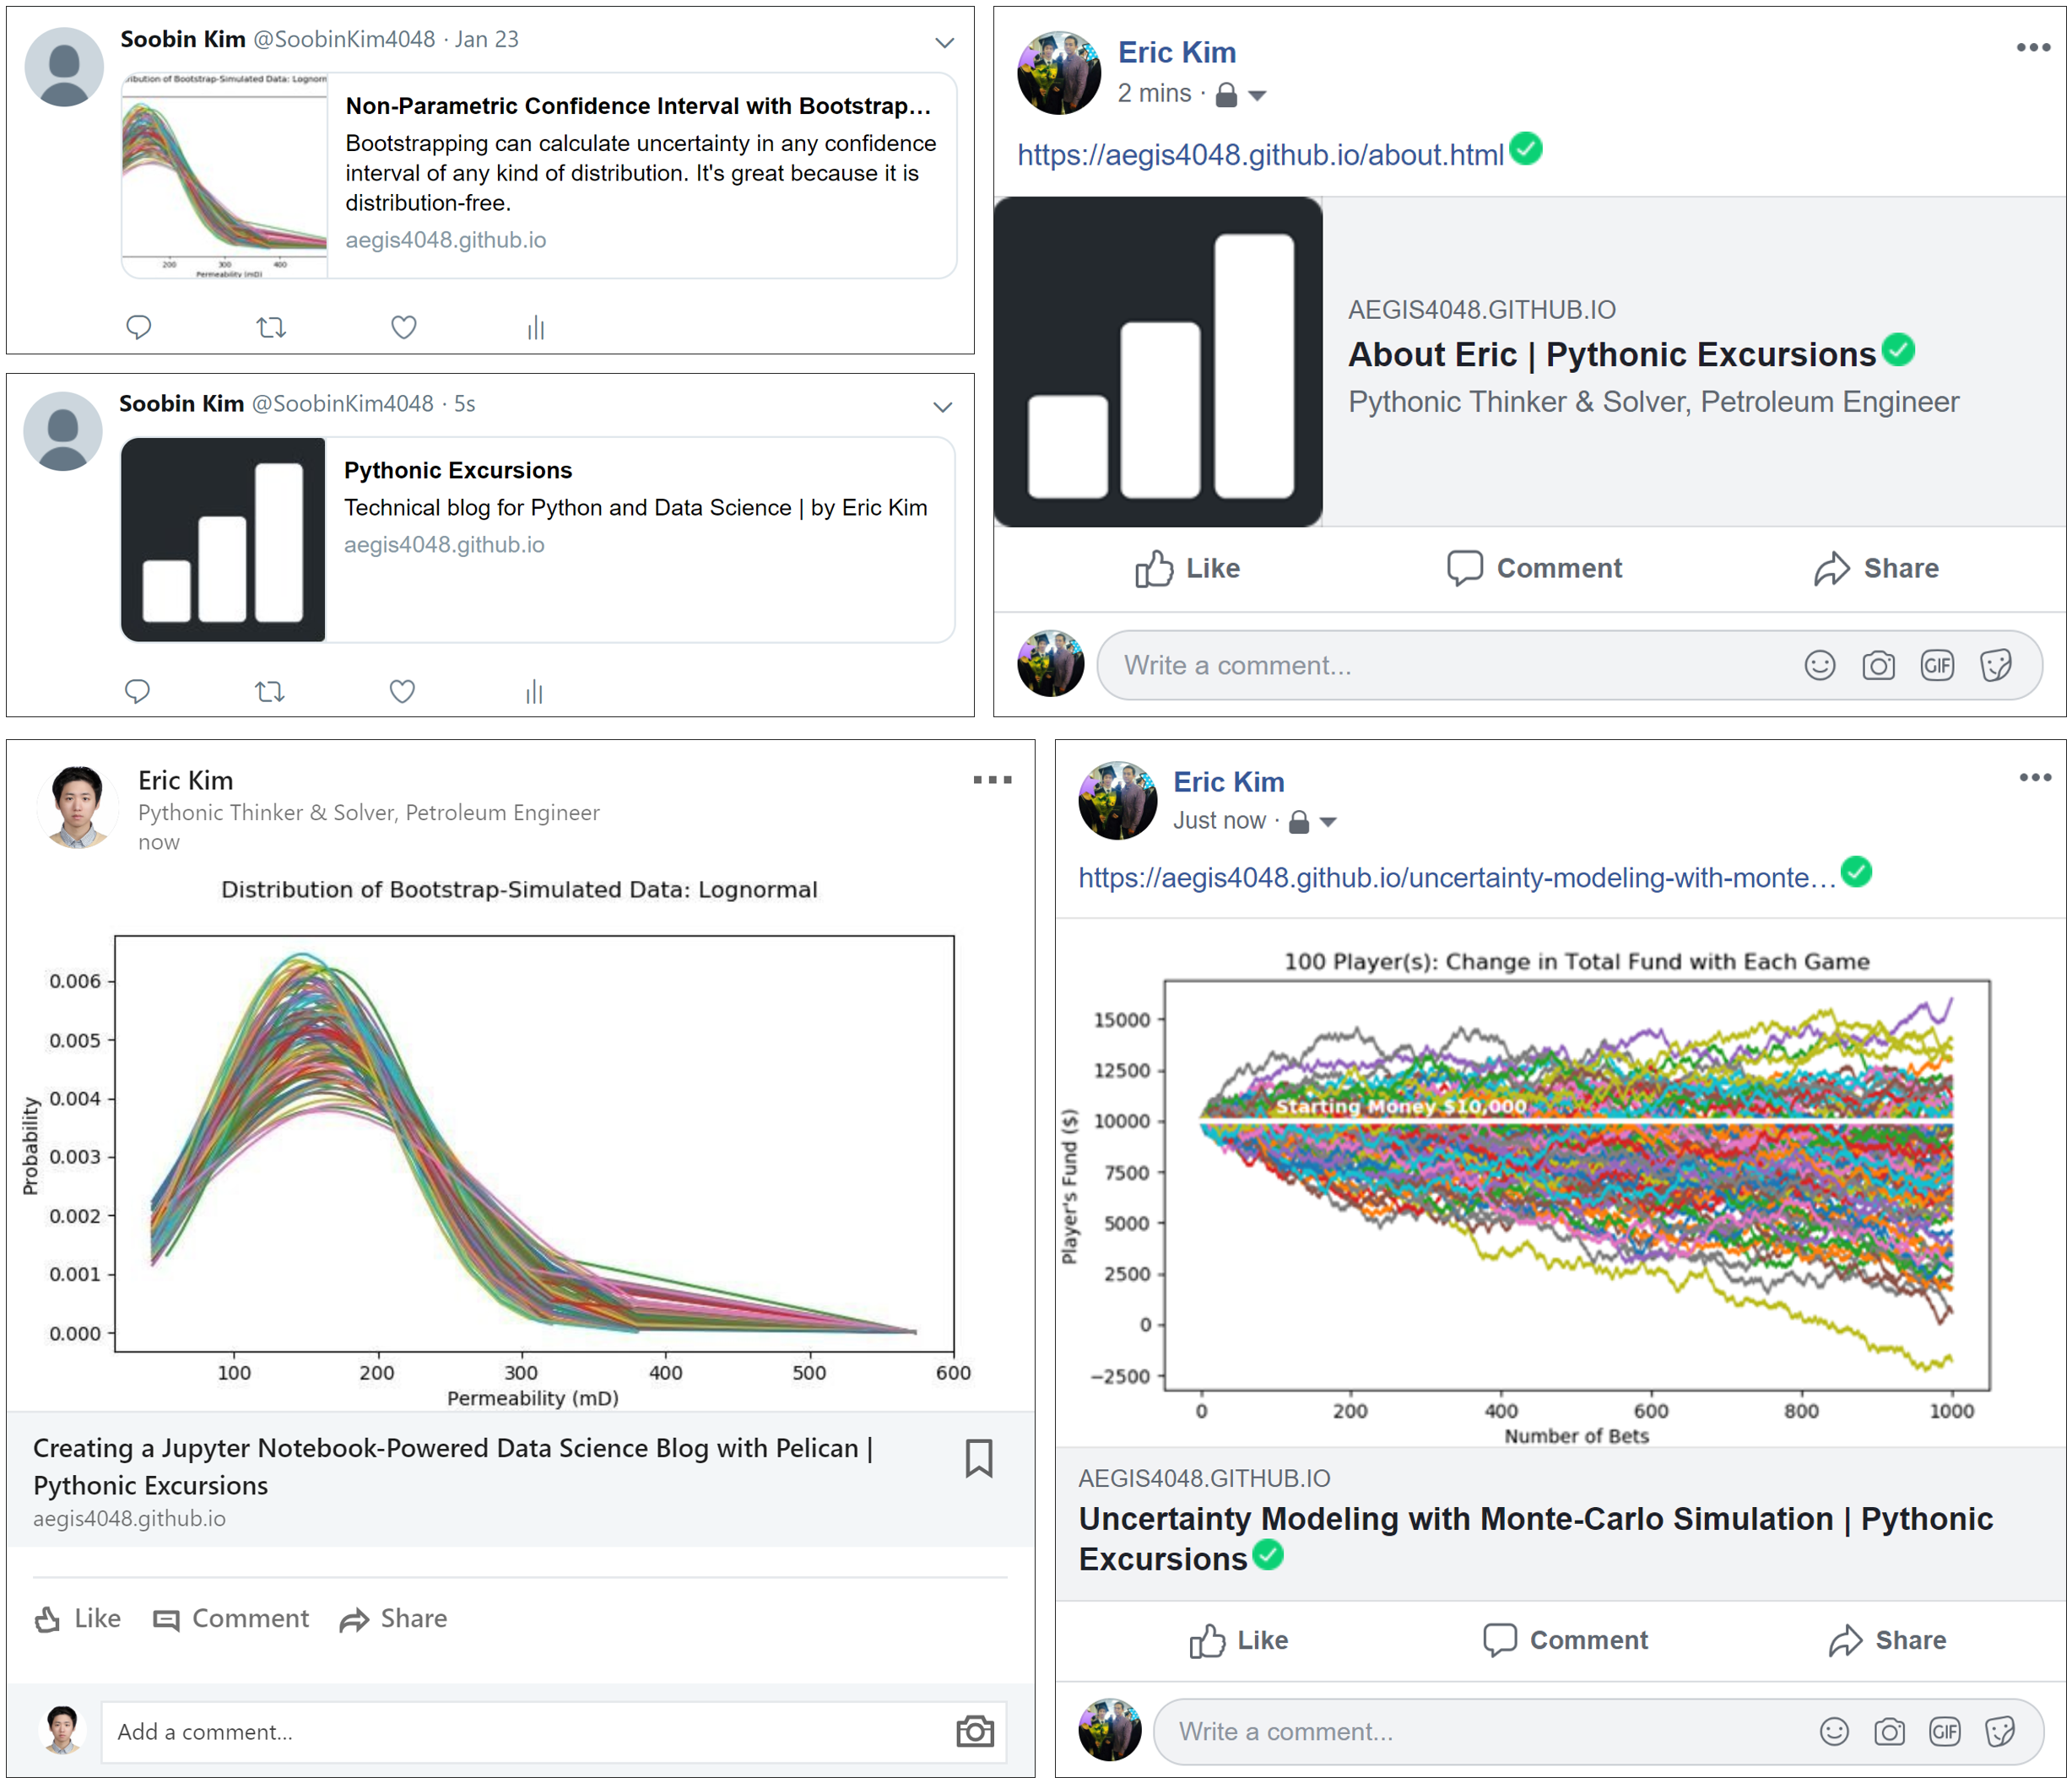
If you do not specify Featured_Image attribute in the markdown file, a default featured image will show up when shared on social media. Default featured image can be set up in pelicanconf.py file. This is what I have for my blog:
pelicanconf.py
FEATURED_IMAGE = SITEURL + '/theme/img/logo_icon_background.png'
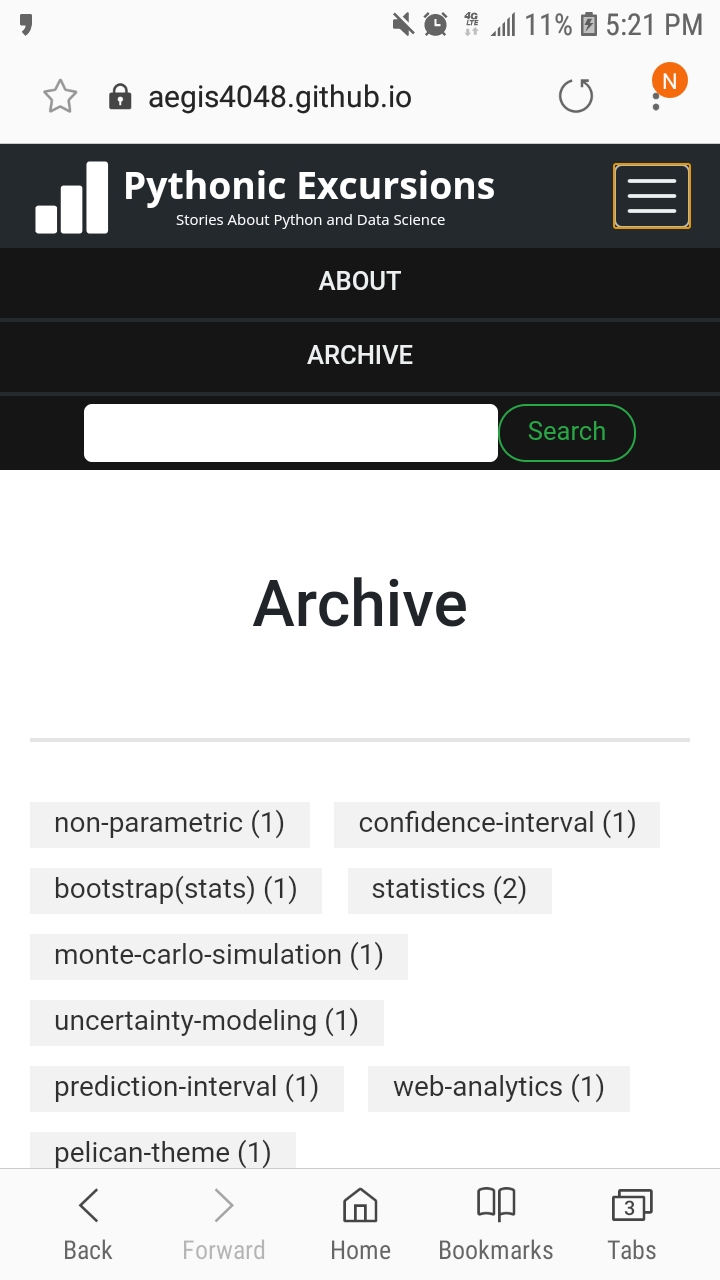
Search Box
Most static websites do not support search box functionality out of the box. However, Pelican supports Tipue Search, a jQuery site search plugin. Talha Mansoor made a pelican plugin that allows Pelican to leverage the power of Tipue Search, and Aegis-Jupyter integrated it to work with articles written in Jupyter Notebook. Take a look at it with your own eyes by scrolling up and actually using the search box in this blog!
Disqus Comment Box
Being able to communicate with the audiences is a quintessential component of a blog. Create an account in Disqus and get your Disqus Website Name here.

Then, declare DISQUS_SITENAME variable in publishconf.py. That's all it takes to have a comment box feature for your blog. Aegis-Jupyter will handle the rest. And, of course, IT'S FREE
publishconf.py
DISQUS_SITENAME = "pythonic-excursions"